No products in the cart.
Beginner Guides
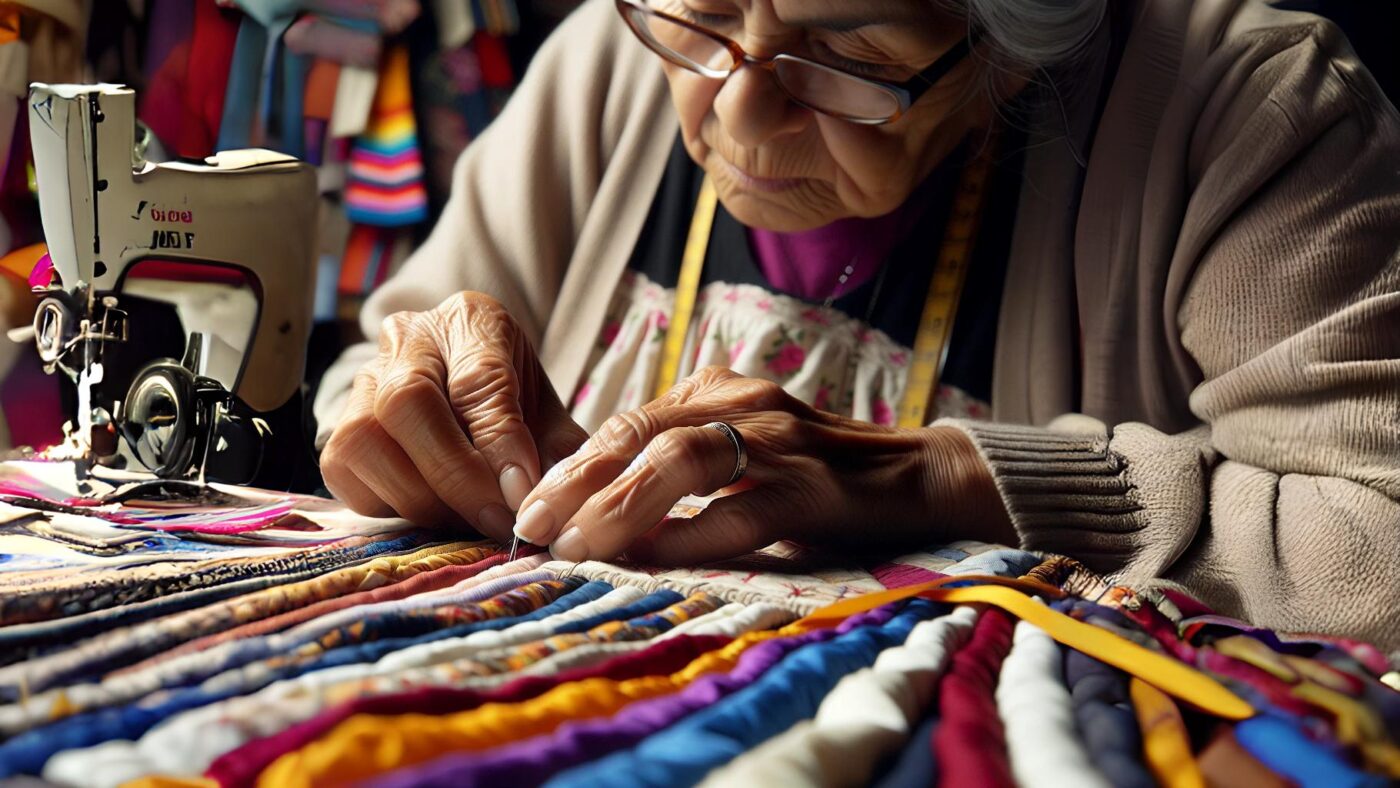
10 Essential Tips for Beginning Quilting, Wow!
04
Dec
Dec
Intro: Avoid These Beginner Mistakes. Quilting tips for beginners.

Oh – quilting. Here’s the thing about starting out, right? Everyone thinks how to quilt it’s just cut and stitch, but honey, let me tell you – there are landmines of no-nos just waiting for you to step on ’em. First off, you gotta resist the urge to go for the cheapest fabric you can find. I know, I know, we’re all on a budget, but cheap fabric? That’s a shortcut to a fraying disaster. And for those quilting tips for beginners, investing in quality materials can make a big difference in your quilting experience.
And the color bleeding? Don’t get me started! Pre-wash those fabrics, or you’ll end up with a dye-tastic mess that’s more tie-dye than timeless. Seriously, are your colors mixing all willy-nilly? It’s enough to make your heart sink.
Now, you might be all about that improvisation (and that’s great – truly!), but for the love of all that’s cozy, don’t wing it with cutting. A reliable quilting ruler is essential and remember, measuring twice, and cutting once is the golden rule for a reason. Believe me, uneven pieces together will haunt your dreams – they just don’t line up, and there you are, all frustrated!
Ah, and a shaky hand with that rotary cutter? Recipe for disaster – and maybe a nicked finger. Take it slow, steady, and safe. Plus, as you start sewing, using a walking foot can help things go together so much better.
Lastly, just a heads up: you’re probably gonna mess up the first few times. It’s a rite of passage. But whatever you do, don’t give up! Those darnings will get straighter, and your quilt patterns more precise – pinky promise. Keep those spirits up, and always use a seam ripper when needed—it’s a part of quilting every beginning quilter should embrace.
My Fabric Colors are Running

Pre-wash Fabrics: Before you start sewing your quilt, wash all of your fabrics separately. This can help remove excess dye and reduce the likelihood of colors running in the future, a tip every new quilter should know.
Use Cold Water: When washing fabrics, using cold water can help prevent colors from bleeding, as hot water can encourage the dye to run, an important tip that I wish I had known when I started quilting.
Use Color Catchers: These are special sheets that you can add to your wash. They capture any loose dye in the water and prevent it from settling on other fabrics, which is especially useful in patchwork where different colors are combined.
Test for Colorfastness: Before combining fabrics in your square quilt, test each fabric for colorfastness by wetting a piece of white cloth and rubbing it on the fabric to see if any color transfers.
Use a Dye Fixative: There are commercial products available that can help fix the dye within the fabric, reducing the chances of bleeding. These can be used according to the product instructions before or after machine quilting.
Avoid Mixing Dark and Light Colors: When planning your quilt, be cautious about placing dark-colored fabrics next to very light ones, as any potential dye transfer will be more noticeable, which can ruin the look of finished blocks.
Use a Synthrapol Detergent: Some quilters use a special detergent that is designed to remove excess dye from fabrics. It can be used as a preventative measure when pre-washing fabrics or for washing the quilt made.
By following these steps, you can help ensure that the fabric colors in your quilting projects remain vibrant and that they do not run or bleed into each other, here are tips and tricks that quilters should know.
Probably its time to visit a quilt shop?..
How do you remove Colour run from fabric?
For beginning quilters, several essential tips to master will help ensure a smooth quilting process and beautiful results:
-
Develop Rotary Cutting Skills: Mastering rotary cutting saves time compared to using templates for marking and cutting fabric pieces.
-
Start with the Basics: Avoid the temptation of purchasing many gadgets or an expensive quilting machine. Focus on acquiring fundamental tools and skills first.
-
Read Cutting Instructions Thoroughly: Before cutting fabric, always read through the instructions completely to minimize mistakes.
-
Maximize Fabric Usage: Cut larger shapes from your fabric before moving on to smaller pieces to make the most of your yardage.
-
Understand Fabric Grain: Knowing fabric grain will improve the quilting process, as working with the grain ensures a smoother, more stable quilt.
These insights are gleaned from The Spruce Crafts, which emphasizes the importance of rotary cutting, and Quilting Daily, which provides tips on fabric usage and reading instructions, as well as Quiltdom, highlighting the importance of starting with the necessary basics to avoid overspending.
My Quilt Doesn’t Look Right

Selecting the Right Fabric: Begin your quilting project with suitable fabrics; this helps ensure the final appearance meets your expectations. Make sure the color palettes harmonize well together.
Precision in Cutting and Piecing: Use accurate tools and methods to cut your fabric. This will contribute to straighter seams and a more polished finished product.
Checking Measurements: Regularly double-check your measurements throughout the quilting process. This helps alleviate discrepancies that can lead to a quilt not aligning correctly.
Seam Consistency: Consistent seam allowances are crucial for a neat quilt. Practice sewing with a uniform seam allowance to ensure that pieces fit together flawlessly.
Fixing Mistakes: If errors are made, it’s usually possible to unpick and re-sew without causing harm to the fabric.
Extra Fabric: It’s wise to have additional fabric available. Mistakes can then be rectified without the stress of running out of material.
These strategies are gleaned from experienced quilters sharing their tips and techniques across platforms like Craftsy and National Quilters Circle, as well as from specific troubleshooting articles like the one on Purple Daisies Quilting.
I Ran Out of Fabric. What to do with quilting supplies?
Oh, honey, let me tell ya, it’s a pickle we don’t wanna be in, but it happens to the best of us – you’re in the flow, your blocks are alignin’, and wham! You reach for more of that darling fabric, and your heart sinks. Not enough! Now what? Deep breath. It’s not the end of the world.
Improvisation is Key: Okay, think of it like jazz; it’s all about the improv. Scour your stash for a complementary substitute. Maybe it’s a chance for a creative twist? A splash of unexpected color could make your quilt sing.
Re-arrange the Blocks: Play around with the layout. Can you juggle the blocks so the new fabric seems intentional? Think of it as a ‘design feature’ rather than a ‘whoopsie daisy’.
The Hunt: If you’re dead set on the original fabric, take to the socials. Quilting groups online are like a bee hive, all buzzin’ to help out a fellow quilter in distress. Someone might just have that piece you’re desperately seeking.
Take Notes: Let this be a lesson, sweetie. Jot down the fabric details next time, so you’re not caught in the same bind. And maybe, just maybe, buy a tad more than you think you’ll need.
It’s your quilt, and remember, imperfections make it uniquely yours. Think of those mismatched blocks as little badges of honor telling the story of your quilting journey. Keep tacking & stay clever!
What to do when you don’t have enough fabric?
Oh, it’s happened to the best of us, staring at a quilt project and realizing you’re a couple of squares short! Don’t fret; here’s what to do when you’re in a bit of a fabric pickle:
- Hit the Scraps: Dive into your scrap pile! Often, I’ll find the perfect piece hiding right under my nose. Mix and match, and who knows? A beautiful, unexpected pattern might just emerge.
- Improvise with Color: If you can’t match the fabric, aim for a complementary shade. It’ll look like you planned that eye-catching contrast from the start. Clever, right?
- Rearrange Blocks: Sometimes, I just shuffle my existing blocks around. Creating a new layout can magically make the fabric shortage less noticeable!
- Play with Borders: I like to think of borders as the quilt’s frame. A wider border can compensate for a smaller quilt if you’re short on your main fabric.
- Patchwork Options: Embrace patchwork purposely. Combine multiple fabrics to create the needed sizes. It’s like making lemonade when life hands you lemons – quilt edition!
- Add Appliqués: When desperate, I appliqué! Mask the issue by adding an appliqué over a less desirable fabric area. Artful and effective.
- Buy More Fabric: Obviously, if all else fails, I’ll take a trip to the fabric store. It’s an excuse for more fabric – not that I need one.
It’s all about improvisation and creativity. Those hiccups along the way? They add character to our quilts and stories to tell. Happy quilting!
My Cut Fabric Pieces Don’t Look Right. Sew it.

Oh, trust me, when those cut pieces come out lookin’ a bit wonky, it can throw a wrench in your quilting groove. No need to fret, though—there’s always a way to get back on track.
First things first, double-check the cutting mat and ruler. We’ve all had those “oh duh” moments where the mat slipped or the ruler’s askew. And trust me, a smidgen off here can mean a hot mess later. Make sure they’re in tip-top shape—no warps or wobbles.
Now, if your fabric’s stretching like it’s in a yoga class instead of holding firm, starch is your new best friend. Give those fibers a good spritz and iron them flat. It’s like giving your fabric a pep talk before the big game! And remember, using a quarter-inch seam allowance is crucial for getting your blocks to line up perfectly.
And hey, don’t get down if you’ve gotta practice your cutting technique. Think about how you’re holding that rotary cutter. Is your grip firmer than your aunt’s cheek pinch at Thanksgiving, or are you letting it wobble like a Jell-O dessert? Keep it steady and confident. Maybe it’s time to change the sewing needle in your machine to ensure the best basting quality.
Last tip? Slow it down. Who cares if it takes a few extra minutes? This ain’t a race. After all, we ‘restitchin’ for the zen of it, aren’t we? A careful, precise cut is worth its weight in gold—or, well, in gorgeous quilts. Keep at it, and before you know it, those pieces will be sharp as a tack and straight as an arrow!
My Fabrics Aren’t Behaving. Wish I had known!

Sometimes, our fabric acts like a rebellious teen — it just won’t do what it’s told. It’s bunching, it’s stretching, or perhaps it’s doing this little dance under the needle that throws everything off. I’ve been there, and let me tell you, it’s enough to test the patience of a saint!
The Pressing Matter: So, the crease fairy has decided to bless every piece of your fabric, huh? Well, that iron isn’t just there to look pretty. Heat, steam, press — and presto! Your fabric should lay flat and behave. Did I hear a sigh of relief?
Searching it out: warp and weft doing their own thing? Spritz a bit of starch on them. You’ll find the fabric goes from a floppy noodle to having the crispness of a military uniform.
Taming the Stretch: Oh, and that stretch? Sometimes fabric has a mind of its own. If it’s like trying to keep a puppy still, you might want to try using a stabilizer to give it some backbone.
Quality Control: Let’s be real — some fabrics are just divas and demand more attention. High-quality materials might cost a pretty penny, but they sure save on headaches. They’ll sew up nicer than a discount bin mishap.
Here’s the deal — we’ve all had moments where our materials seem possessed. But a little love, firm guidance, and the right quilting supplies can usually convince them to fall in line. Keep fiddling, and you’ll get those fabrics flying straight soon enough!
How can you tell if the fabric is bad? Square quilt.
It’s crucial to start with good material − bad fabric can really put a damper on your quilting joy! Here’s how I spot the troublemakers:
- Trust the Touch: If it feels scratchy or too thin, I’m wary. Quality fabric should have a nice, soft hand and enough heft to withstand all the stitching and handling.
- Look at the Weave: I hold the fabric up to the light and give it a careful look. If the weave is loose or uneven, stitching might turn into a nightmare.
- Color Bleed Test: I always do a quick wash test on a small piece. If the dye runs faster than gossip, that fabric is not joining my quilt party.
- Check the Grain: Wonky patterns or prints that veer off at strange angles give me pause. A straight grain ensures my quilt won’t warp into a funhouse mirror version of itself.
- Pilling Potential: Rubbing the fabric between my fingers tells me if it’ll pill after the first wash. Nobody wants a bumpy quilt, after all.
- Price Point: Let’s be honest, if it’s suspiciously cheap, there’s probably a reason. I’m not saying to break the bank, but good fabric is worth a few extra dimes.
- Brand Recognition: I tend to stick to brands with a sterling reputation. No name, no fame… and possibly no good.
Choosing the right fabric is a cornerstone of quilting joy, so I take my time and pick wisely!
My Finished Blocks are Not All the Same Size. Check the quilt blocks.

Dealing with blocks of varying sizes sure can throw a wrench in the works, can’t it? But never fear – there’s a way around this common quilter’s quandary. First off, fully admitting that it’s frustrating is okay – it’s a part of the process.
It’s crucial to check the accuracy of the seam allowance; it’s the cornerstone of consistent block sizes. I’ve learned that a quarter-inch seam guide is worth its weight in gold thread. This little tool clings to the edge of your sewing machine like a lifeline.
Another thing I keep reminding myself is to pause and check the measurements after each cut. Seems tedious, I know, but it’s a game-changer. A slight deviation might not look like much, but it adds up – just like sneaking an extra cookie can catch up with your waistline (oops!).
And pressing – oh, goodness, pressing the fabrics can’t be understated! It’s not just a task to do willy-nilly; it sets everything in place. Somehow, I used to overlook it and end up puzzled by the wonky results.
Last piece of advice? Patience, patience, patience. It’s natural to want to charge ahead, but sometimes, you’ve got to slow down to eventually speed up. It’s a bit counterintuitive, but hey, so is life! Keep practicing, and before you know it, those blocks will shape up just fine.
This Quilt Will Never Get Finished

Ah, I know the feeling all too well—the infamous “This Quilt Will Never Get Finished” phase. Almost every quilter I’ve met, myself included, has hit this wall at one point or another. You start small with a burst of enthusiasm, piecing together fabrics with dreams of the cozy masterpiece you’ll create, and then, bam! You’re knee-deep in fabric scraps, tangled thread, and half-completed blocks, wondering if the end is anywhere in sight.
Let me tell you, my friend—it is. The key is breaking the project into manageable parts. Don’t let yourself get overwhelmed by the size of the task; instead, focus on sewing strips together, one patch, one stitch at a time. It’s okay to feel like your smaller quilt is taking an eternity; remember, quilting is a marathon, not a sprint—it’s all about the joy of creating, not just crossing the finish line.
And sometimes, you’ve got to shake things up a bit. If you’re fed up with that one block that’s been giving you the stink eye, put it aside! Work on another section, or even start a tiny side project—as long as you’re quilting, you’re making progress. It’s all about keeping the momentum going.
Remind yourself why you started this quilt in the first place. Was it a gift? A personal challenge? Whatever it was, reignite that flame of motivation. And just imagine the sense of accomplishment waiting for you at the end. Trust me, when you’re curled up under that finished quilt, all the hiccups along the way will seem like distant, inconsequential memories. You’ve got this!
What is an unfinished quilt called?
Getting into the cozy world of quilting, are we? You’ll come across a quilt-in-progress at some point, and you might wonder what to call it. It’s a piece with so much potential and effort already poured into it. Here’s a nifty term for you:
- UFO: This quirky acronym stands for Unfinished Object, a term of endearment in the quilting community. It refers to those quilts that have been started with gusto, yet they linger, waiting for the right inspiration or time to be completed.
Have you got a UFO lurking in your craft room? Don’t worry, it’s a common occurrence, and it’s all part of the journey. Remember, every stitch counts, whether it’s the first or the last! Keep at it, and soon enough, that UFO will turn into a cozy masterpiece.
My Fabric Pieces Aren’t All the Same Size

I totally get the frustration when your fabric pieces seem to be marching to the beat of their own drum, each one deciding on a slightly different size. It’s like they’re playing a game of ‘who can be the most unique.’ But here’s the lowdown on keeping those fabrics in line – precision is your best pal!
First off, measure like it’s your new hobby. Consistency can’t be overrated, and that trusty ruler? Make it your constant companion. Always double-check your measurements before you cut. Slip-ups here can lead to a mismatched patchwork that’s more a jigsaw puzzle than a cozy quilt.
Next up, let’s chat about cutting tools. Dull blades can chew up your fabric, leading to sizes that are as inconsistent as my Aunt Judy’s casserole. Ensure your rotary cutter is sharp enough to slice through fabric like butter. It makes a world of a difference – trust me.
And we mustn’t ignore the seam allowance. It’s the unsung hero of uniformity. A tiny deviation might seem harmless but multiples of those “it’s just a hair off” can add up to a wonky quilt. Aim for an exact seam allowance, and keep it as unwavering as your love for quilting.
Hot tip: iron with love, not with muscle. Overzealous pressing can stretch those fabric pieces into abstract art. A gentle, firm press will keep everything crisp and even.
Stay the course, dear quilter. Master these tricks, and you’ll have all your fabric pieces in tip-top uniformity. Keep at it, and you’ll be piecing together perfection in no time!
My Stitches Are Unravelling

Unraveling stitches can truly ruffle my feathers; it’s like watching all your hard work come undone, literally! When you’re like me, pouring your heart into each piece of fabric, and seeing your stitches slip away can really eat at you. Let’s do a deep dive, shall we?
First things first, let’s look at the thread quality. Trust me, I’ve learned the hard way that scrimping on a thread can lead to some frustrating moments. A low-quality thread is practically a ticket to unraveling stitches down the line—you want something durable and long-lasting.
Then there’s the question of your tension. My machine can be a fickle friend—get the tension wrong, and before you know it, your stitches are as loose as a goose. It’s crucial to find that sweet spot where the thread lays nice and even and doesn’t pucker the fabric or leave you with loops.
Don’t forget the backstitch, either. When I first started, I’d zoom down those seams, not giving a second thought to locking them at the start and end. How quickly I learned! A few backstitches will lock in your work and save you the heartache of seeing it come apart.
Lastly, it might be time to change your needle. A dull or damaged needle doesn’t just make for shoddy work—it can actually mess up your stitching altogether. I like to swap mine out regularly to ensure that my stitches are pristine.
In conclusion? Check your materials and methods. It’s amazing what a few small tweaks can do for your stitching woes!
Why does my stitching keep coming undone?
Unraveling stitches can be so frustrating, can’t they? Especially when you’re starting out, it feels like a mystery wrapped in a riddle. But don’t you worry, I’ve got some trusty pointers to help solve that conundrum!
-
Check Your Thread Tension: It’s gotta be just right – not too tight, not too loose. Like Goldilocks’ porridge, you know? If it’s off, your stitches could say “sayonara” before you even get moving.
-
Quality of Thread Matters: Don’t scrimp on this. Cheap thread can be the culprit behind breakage and knots that lead to your stitching saying adios.
-
Needle Know-How: Your needle should be in tip-top shape. Dull or damaged needles are notorious backstabbers that can sabotage your stitches.
-
Consistent Speed Is Key: Racing through can tangle up your thread while knitting at a snail’s pace might not give the tension you need. Find that sweet spot; your stitches will thank you for it.
-
Thread Tail Length: I’ve learned this the hard way – leave a decent tail after threading. Otherwise, those stitches might just pull a Houdini on you!
-
Routine Check-ups: Peek under the hood – which means your sewing machine. Regular cleaning and maintenance can keep those pesky stitch gremlins at bay.
-
Proper Presser Foot Pressure: The right pressure can make all the difference. Too much or too little can lead to a stitch catastrophe, so keep it balanced.
Remember, every stitch counts, and so does every solution when you’re waltzing through the whimsical world of quilting! Keep these tips close to your heart, and your quilting adventures shall be a smooth sail.
I Can’t See My Design Clearly

Ugh, when I’m piecing together my latest quilt creation, there’s nothing more maddening than squinting to make out my design. It’s gonna take the joy right out of quilting if I can’t see my beautiful patterns clearly!
Let’s iron out this wrinkle, shall we? Good lighting—oh, it’s non-negotiable. I swear by it! If my trusty sewing nook is looking a bit dim, I pull in an extra lamp or two. Often, I opt for natural light bulbs. They mimic daylight and are a godsend for making those colors pop and easing the strain on my peepers.
Now, I digress, but a magnifying glass can be a quilter’s bestie. Some nifty ones clamp right onto your machine or table. They swoop in like a superhero when you’re dealing with intricate stitches or those pesky tiny prints.
And about those prints—I’ve learned my lesson. It’s tempting to go wild with elaborate patterns, but if clarity takes a hit, what’s the point? Choosing a design that’s bold and straightforward makes it a breeze to follow along—your future self will thank you.
A smart trick I picked up? I lay my pattern out flat before diving in. Sometimes, I tape it up close by so I can sneak a quick peek without craning my neck. Saves a bunch of grief and a sore neck to boot. Remember, it’s all about staying cozy and keeping that quilting groove going.
Beginner Quilting Tips: Recap

Alrighty, here’s the scoop on Beginner Quilting Tips! Whew, we’ve been stitching together some wisdom, haven’t we? Let me bundle it up nicely and snugly with a sweet little recap.
-
Start with Simplicity: Honey, resist those complex patterns. I started with basic blocks and let me tell ya, it was a lifesaver. It kept the frustration at bay and I actually finished my project without wanting to throw it out the window!
-
Quality Tools are Key: Can’t stress this enough—invest in decent tools. A sturdy rotary cutter, a self-healing mat, and sharp scissors? They make a world of difference. Trust me, your hands and sanity will thank you.
-
Precision is Non-Negotiable: In the quilt world, accuracy is everything. Those seam allowances should be consistent—don’t eyeball it! When things line up, the result is pure magic.
-
Press for Success: My mantra? Press, don’t iron. Flattening those seams without stretching the fabric keeps everything crisp and professional looking.
-
Machine Matters: If your machine is giving you grief, don’t ignore it. A well-maintained machine runs smoother, and isn’t that just a breath of fresh air?
-
Binding Basics: That final edge can be tricky, I won’t lie. But, practice makes perfect. That’s the honest truth. Patience and careful stitching will give you a finish to be proud of.
Now, remember, every quilter was a beginner once. Keep your chin up and your thread tension even, and you’ll quilt up a storm before you know it! Enjoy the journey, dear, it’s absolutely worth it.