No products in the cart.
Beginner Guides
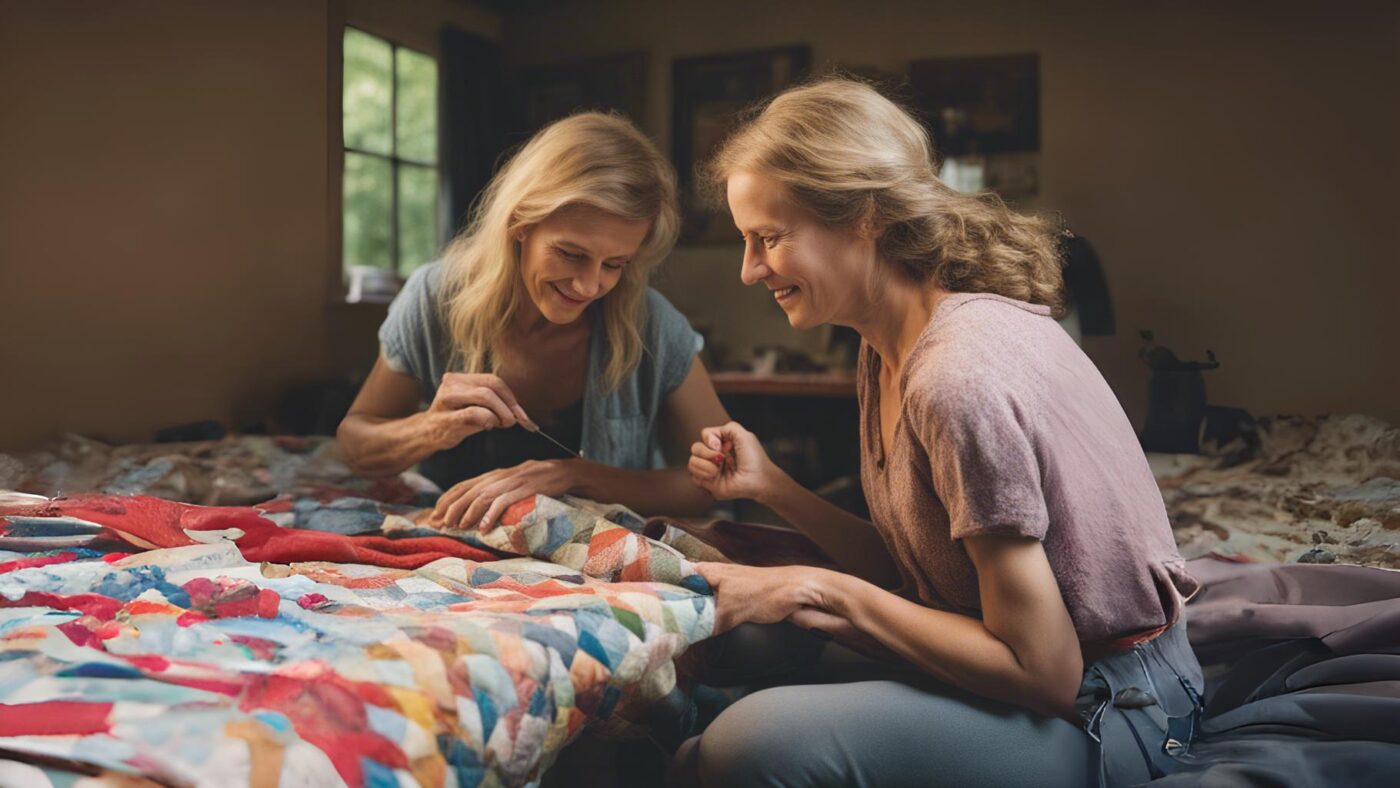
How to Quilt: A Beginner’s Step-by-Step Guide
04
Dec
Dec
Choose a Quilt Pattern

Alright, let’s dive right into one of the most exciting parts of quilting—picking out your pattern! Now, you might be thinking it’s as simple as picking the prettiest design, but there’s a wee bit more to consider, especially if you’re just starting out and not sure where to start. Choosing a quilt pattern is like picking the perfect outfit for a first date; you want something that makes you feel confident and comfortable, while still making a statement.
Consider starting with something straightforward; trust me, there’s nothing wrong with easy patterns that make a small but stunning statement. They’re like a warm hug—they allow you to practice basic techniques without overwhelming you. A simple patchwork or a nine-patch pattern can be as charming as an intricate design, so don’t you dare think less is boring!
What about your personal taste? That’s paramount. Yes, I want you to choose a pattern that speaks to your heart. Maybe you’re all about florals, or perhaps geometric patterns tickle your fancy. Whatever it is—go for it! But remember, you’ll be spending quite some time putting it together, so pick a pattern that you can hold your quilt passion for from start to finish.
And, oh my, the color choices! The pattern you pick will guide you through a dazzling world of fabrics, shades, and textures. I always say it’s a tad like being a kid in a candy store—pure delight! Just make sure the colors complement each other unless you’re intentionally going for that avant-garde look. You might want to visit a local quilt shop for inspiration, where you can see and feel the fabrics in person.
The bottom line? Find a pattern that challenges you just enough to keep things interesting, but doesn’t cause a full-blown temper tantrum. That sweet spot is where the magic happens, and trust me, when you’ve finished that quilt, you’ll be over the moon with pride!
Choose a quilt pattern for beginners
Choosing a quilt pattern when you’re just tipping your toes into this quilting sea can be such a whirlwind of excitement and, I won’t lie, a tad intimidating. But here’s a handful of tips to set you on the right patchwork path:
- Start with simplicity. Go for a quilt pattern that doesn’t have too many intricate details. A basic block pattern is your best pal—it’s easier to handle and you’ll be less likely to get twisted in a tangle of thread and fabric.
- Measure thrice, cut once! Double-check those measurements before you snip. It’s all fun and games until one block is off, and then, honey, it’s a patchwork predicament you don’t want to unravel.
- Standard squares are splendid. Stick to square or rectangular quilt blocks for your first project. These shapes are the building blocks of quilting and they’re a breeze to stitch together.
- Lean on lines. Opt for patterns with straight lines rather than curves. Curves can be curmudgeonly for beginners, so best leave those loop-de-loops for later.
- Size matters—but not too much. A smaller quilt might seem less daunting, but a slightly larger one gives you more room for minor missteps that can be hidden in the grand scheme of your fabulous creation.
- Positive vibes only. Choose a pattern that makes your heart sing. If you’re full of beans about the design, you’ll be more motivated to see it through when the going gets tough.
Remember, dear, it’s supposed to be fun! Take a deep breath and sink into the comfort of the quilt you’re about to birth into the world!
Gather Tools and Materials

As a passionate quilter, gathering the essential quilting essentials and materials is the first step to bring that cozy quilt to life—a project where every stitch tells a story. You’ll want to make sure your sewing machine, that trusty sidekick, is in tip-top shape; nothing sours the quilting experience like a temperamental machine! And then there’s the small yet mighty quarter-inch foot, which I like to think of as a secret weapon for piecing together those perfect seams.
Let’s not forget the walking foot, oh-so-important for keeping those layers snug and avoiding any slip-ups. Think of it as a dance partner for your fabric, matching your every move to ensure everything stays in sync. You’ll need some quilter’s cotton too—a canvas for your creativity. It comes in a whole kaleidoscope of colors and patterns, just waiting for you to transform it into something magical.
And there’s the essentials—like an accurate rotary cutter and a self-healing mat that protect your table and your sanity, and of course, a clear ruler to make sure every cut is as straight as your intentions. It’s like preparing for a grand feast, only the ingredients are fabric and thread, and the meal is a quilt that warms both body and soul. Isn’t it marvelous? Now, with all these gathered, it’s almost time to thread that needle and set your creativity free!
How to make a quilt by hand for beginners
Here’s how to get started if you’re new to the enchanting world of quilting:
- Essential Supplies: My dear, to dive into basic quilting, you’ll need to gather your tools — think fabric, thread, needles, and scissors. Make sure they’re comfortable and inviting for your fingers and your soul.
- Design Your Quilt: Ooh, the excitement! Sketch a simple design. Choose shapes and colors that speak to you, that whisper tales of comfort and joy.
- Cutting Fabric: With precision and care, cut your fabric pieces. Each one is a building block in the masterpiece you’re about to create.
- Piecing the Top: Ready to quilt together the slices of fabric? Seam by seam, line them up, and stitch them with a patience that might just rival a watchmaker.
- Create the Quilt Back: Here comes the unsung hero, the quilt back. It should be just as lovely as the front, a quiet harmony to the melody of the top.
- Layering and Basting: Ah, the layering — like a delicious sandwich with your quilt top, batting, and quilt back. Baste them, and suddenly they’re best friends, inseparable.
- The Quilting: Now, hand-stitch or machine-quilt as your heart desires. It’s the rhythm of your heartbeat that you’re stitching into this creation.
- Binding: Finally, bind the edges with a frame-worthy of your art. It’s like signing your name to a masterpiece!
Remember, my friend, each stitch is a word in the story your quilt tells. Embrace the process, and your quilt will hug you back with every use.
Cut the Patchwork

Cutting the patchwork is like laying the foundation to make a quilt from start – it’s got to be spot on. Here’s how you dive in: start by choosing from your quilting tools a reliable pair of scissors or a rotary cutter – something that feels right in your hand and gives you confidence. Next, pick out the right ruler; it’s your pal for precision. Now, iron your fabric. Yes, it seems like a chore, but trust me, it smooths out the wrinkles and ensures accuracy.
Lay the fabric flat on your cutting mat – that’s your canvas – and align the ruler with the edge of the fabric. Press down firmly to keep it from hopping away from you (we’ve all been there, haven’t we?). Hold the rotary cutter like a pizza wheel of creativity and roll it alongside the ruler’s edge, applying even pressure. It carves out your quilt’s future shapes larger than the quilt top, making you feel like a true craftswoman. Oh, and keep those fingers away from the blade’s path – safety first, always.
After you’ve cut strips, you’ll cross-cut them into squares or rectangles depending on the size of the quilt you aim to create – it’s like building blocks for adults, isn’t it? Once all your pieces are ready, lay them out in the pattern you’ve chosen. It’s akin to a puzzle, finding the perfect spot for each piece. It’s totally okay to feel a little thrill each time the corners line up just right – it’s the little joys of make a simple quilt come to life!
Remember, patience is your co-pilot in this journey. Double-check your measurements before cutting, alright? A smidge off here and there and you’re in a pickle. So take a deep breath, measure twice (maybe thrice), and cut once.
Fastest way to cut quilt squares
As someone who’s spent countless hours with fabric and thread, let me say, cutting quilt squares can seem like a chore, but boy, it doesn’t have to be! Follow these nifty tricks; you’ll zip through the process in no time.
- Bulk Cutting: Stack multiple layers of fabric to cut many squares at once. Just ensure the edges align perfectly. It’s like slicing a cake – one push of the cutter, and you’ve got enough layers for a sweet little patchwork quilt!
- Rotary Cutter: A rotary cutter is your best friend for speed. With just a whizz around your ruler, you have precise squares quicker than you can say “stitch.”
- Pre-Cut Fabrics: If you’re not keen on cutting, grab pre-cut fabric packs. They’re handy and a real time-saver, plus they all match – a beginner’s dream!
- Use Freezer Paper: Iron-on freezer paper to your fabric for an easy-to-cut, non-slip template that peels right off. It’s like magic, and not a single thread gets hurt!
- Laser Square Tool: A laser square tool can be a game-changer. It projects lines, so you can align and cut without constantly measuring. Straight as an arrow, every time!
- Snip Corners: Cutting a tiny notch off the corners of your squares can reduce bulk when you stitch them together. It’s a tiny detail that makes a big difference on the finishing side of the quilt.
And there you have it, the low-down on speeding up your square cutting. Now roll up your sleeves and get to it – the quicker you cut, the sooner you’re quilting!
Sew the Patchwork

Stitching the patchwork together is where the magic happens; it’s like watching your jigsaw puzzle come to life, thread by thread. Let me walk you through it, step by step—you’re going to learn how to sew and become a quilting wizard in no time!
First things first, lay out all your cut pieces on a flat surface. It’s super important to see the big picture before you dive in. Arrange them in the pattern you’ve chosen, which, trust me, might take a bit of fiddling around until it looks just right. The idea is to make one large masterpiece from many pieces, similar to a lot of quilt patterns out there.
Once you’re happy with the layout, it’s time to piece the quilt from start to finish. Begin with individual rows; take two squares and place them right sides together. Now, here’s where the fun begins! Thread your needle or rev up that sewing machine and stitch a oh-so-careful quarter-inch seam along the edge. The goal is to make the process smooth and the seams to make everything hold together securely.
Continue this process, attaching squares together, until a full row is pieced. Then, step back and admire your work—it’s looking good, right? After you’ve got your rows all stitched up, it’s time to press those seams. Some prefer seams pressed open, others to one side—it’s up to you, but just be sure it’s neat!
And before you know it, the entire quilt top is complete! Your heart might just skip a beat when you see it; it’s not just fabric and thread—it’s a piece of art that you’ve made.
Sew the patchwork for beginners
Quilting can feel like a giant jigsaw puzzle for us crafters, right? Luckily, when you’re sewing the patchwork, it’s all about taking it one stitch at a time! Here’s how to start patchwork quilting:
- Choose Your Fabric: Gosh, isn’t fabric shopping just the best? Pick out cotton fabrics that make your heart sing – they should be like best friends that get along (in terms of color and pattern).
- Cutting the Pieces: Precision is key. Grab a rotary cutter and mat; you’ll thank yourself later when your pieces come together like a dream.
- Piece by Piece: Start with simple shapes; squares and rectangles are your new BFFs. Sew them with a quarter-inch seam allowance for that oh-so-neat look.
- Press, don’t Iron: Now, this might seem picky, but pressing your seams will make all the difference. Use your iron to press the seams flat rather than moving it back and forth.
- Layout Before Sewing: Play around with your pieces on a flat surface, trust me, it’s a lifesaver. It’s like taking a preview peek before committing.
- Stitch the Rows: Line up those rows nice and neat, and feed them through your machine. Remember, patience is a virtue!
- Join the Rows Together: You’re nearly there! Join those rows together carefully, keeping an eye on matching up seams for a result that’ll make you proud.
Every stitch is a step closer to a beautiful quilt that you’ve poured your soul into – what could be more satisfying? Keep at it, and trust me, that learn how to make instinct will soon have you quilting in your sleep!
Baste the Quilt

To effectively baste a quilt before quilting, quilters utilize various methods to secure the quilt top, batting, and backing:
- Pin Basting: This involves placing safety pins over the quilt sandwich to hold the layers in place. It’s secure but can be time-consuming.
- Spray Basting: A method using a temporary adhesive spray to stick the layers together, recommended for beginners because it is easier and faster.
- Stitch Basting (Thread Basting): This traditional method includes sewing long, loose stitches by hand or machine across the quilt to keep layers stable.
- Glue Basting: Similar to spray basting but uses a specific quilting glue applied in small amounts to stick layers.
- Fuse Basting: This method uses a fusible product to iron the layers together temporarily.
For beginners, spray basting is typically advised as it is more straightforward and minimizes the risk of injuring oneself with pins. The process involves ironing the top and back to remove wrinkles, laying out batting, placing the backing fabric smoothly, and gluing or spray adhering the backing fabric to the batting before securing the quilt top.
Each method suits different preferences and project requirements, but beginners may benefit from starting with spray basting for its simplicity and efficiency.
How to baste a quilt with thread
Basting a quilt, now that’s an essential step – it’s how you secure everything before bringing it all together. Let me guide you through how to baste a quilt with thread, ensuring things don’t shift around as you quilt:
- Lay Out Your Quilt: Find a large surface, and spread your quilt back out flat. Smooth out any wrinkles – this is no place for a speed bump on your quilting journey!
- Add the Batting: Lay your batting on top, ensuring it’s nice and snug with no folds. It’s the fluffy heart of your quilt, after all.
- Quilt Top Placement: Now for the star of the show – your quilt top! Place it right side up on the batting, smoothing from the center out.
- Thread Basting: Grab a needle and some sturdy thread. You’re sewing a temporary grid over the quilt. Think of it as tethering your layers together – like holding hands with your patchwork pieces.
- Start in the Center: Always begin in the middle – it’s your quilting compass. Stitch out to the edges in a delightful daisy-chain pattern.
- Long Stitches: Long stitches are the name of the game. No tiny stitches here – they’re like temporary road markings, guiding you on the journey.
- Remove Excess: Once you’ve secured everything, trim off the excess batting and backing – clean and tidy edges are what we want.
Feels like your small quilt is coming together, doesn’t it? Once you know your way around your quilt, it’s like your quilt and you are in a perfectly choreographed dance. So, take a little time, master these quilting basics, and cherish the process. And hey, quilting tutorials? Sometimes they’re just the ticket when you want to master the nuances of quilting and sewing.
Quilting Stitches

Let’s talk quilting stitches—they’re the essence of quilt making, the component that both decorates and joins the layers of a quilt. If you’re new to this craft and looking to learn to quilt, beginning with the basics of quilting is a great start.
- Hand Quilting: Embrace the tradition and engage in the meditative process of creating your favorite quilt stitch by stitch, an homage to the times of our grandmothers.
- Machine Quilting: Opt for speed and variety with modern sewing machines that offer a plethora of stitches, making it possible to make elaborate quilts. Free motion quilting, a type of straight-line quilting, allows for creative expression with dynamic designs.
- Stitch Length and Tension: Aim for 10 to 12 stitches per inch to ensure durability, and maintain a tension that’s neither too loose nor too tight for the perfect stitch.
- Practice: To make beautiful quilts, practice is key. Try straight-line quilting or free motion quilting on scraps to find your rhythm and perfect your stitches.
In summary, whether you choose to quilt by hand or machine, remember to consider stitches length and tension, and practice to enhance your skills in quilt making. These basics of quilting will help guide you from start to finish as you embark on making your first quilt or adding to your collection of quilts to make.
Bind the Quilt

Binding a quilt, a quintessential step in quilt making, involves covering the raw edges to give the quilt a finished look, prevent fraying, and secure the layers of a quilt. Here’s a brief guide to quilting this stage:
Choose Fabric: For durability, select a fabric with a crosswise grain to bind your quilt, and ensure it complements or enhances the quilt’s design.
Cut Strips: Slice the fabric into strips to create the binding, sizing them appropriately for the edge of your quilt.
Sewing the Binding: Stitch the binding strips end to end. Then, fold them in half lengthwise and iron flat.
Attach Binding: Begin sewing the folded binding to the quilt’s perimeter, mitering the corners to ensure a crisp finish.
Machine vs Hand Finish: Decide whether to machine-sew the binding for swift completion or hand-stitch for a traditional appearance on your quilt.
While hand-stitching the binding can add a refined touch, many opt for a complete machine-sewn approach for its swiftness. Binding typically marks the final step in making a quilt, coming after putting it together to make the quilt sandwich and quilting lines.
Enjoy Your Quilt! Conclusion

As you wrap up the magical journey of making your first quilt, take a moment to appreciate the beauty of your finished quilt. Quilting isn’t just about connecting quilt fabric; it’s a way to create a tapestry of memories and showcase your unique craftsmanship. From the very beginning, when you started quilting, selecting fabric for a quilt, to the patient quilting stitch by stitch—each step is a crucial part of the adventure.
Isn’t it delightful when the corners align perfectly, and the quilt designs flourish? Like watching a garden bloom, your quilt now exudes the care and creativity you’ve poured into it. Picture the snuggles—countless cozy moments are now woven into the layers of the quilt.
Each quilt tells its own story. Don’t worry about the minor flaws—they’re the hallmark of a handmade treasure. With every quilt you piece together, your skills will grow immensely.
So, what’s next for you in quilting? Perhaps an easy quilt with bolder colors or experimenting with free-motion quilting? Maybe you’ll find quilting to guide someone else through their quilting for beginners journey. Whichever path you choose, keep the spirit of quilting alive. With every pull of the thread and snug quilt binding, you’re creating warmth. Continue to stitch, create, and cherish every moment spent with your splendid quilts.